


I’m fairly new to the world of 3D printing, but wanted to get into it as a hobby, but also because I need plenty of brackets for the smart tech installed around my home.
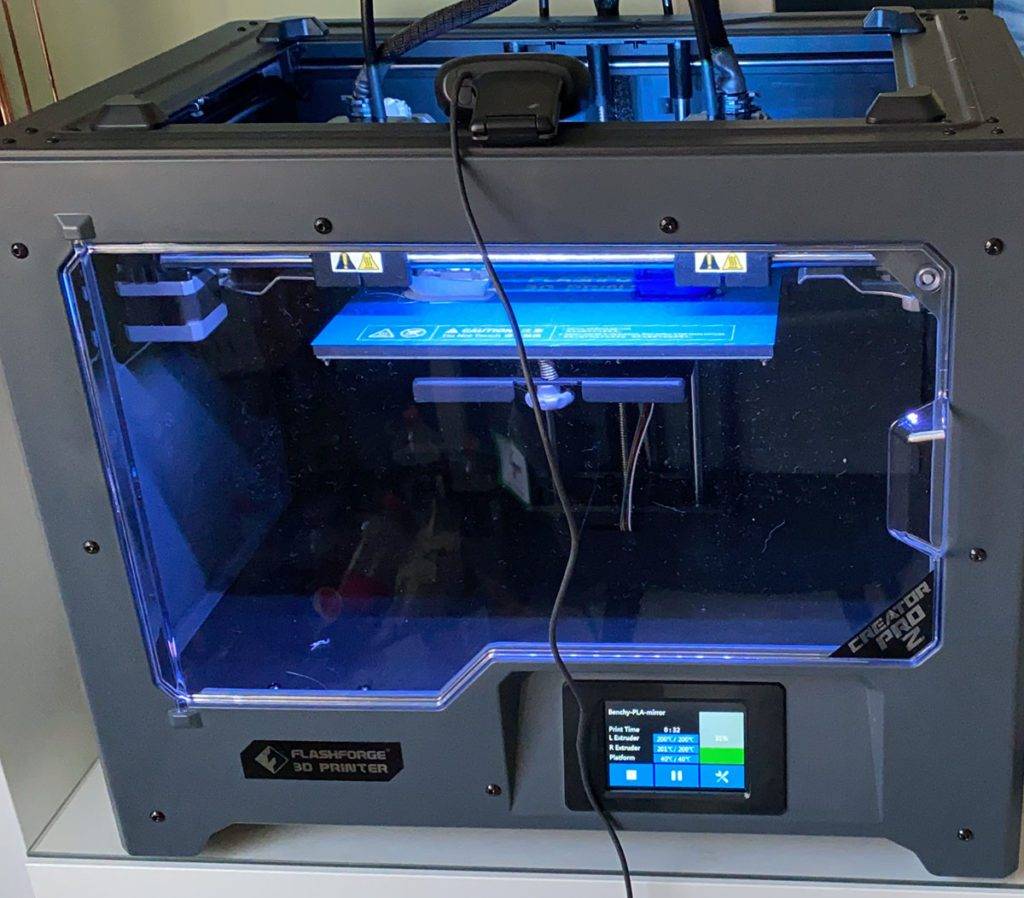
After months of watching endless videos and reading reviews, I finally decided to buy the Flashforge Creator Pro 2. Mind you, I had settled for a Creality CR-6 SE originally, but then changed my mind to this one, as I wanted something enclosed, as it would make printing with ABS easier.
Spoiler alert, I’m very happy with this machine, but that doesn’t mean there aren’t things I’d change.
Unboxing and setup
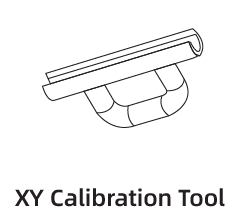
As you’d expect, there are instructions included in the box, but they aren’t up to date, and don’t cover what all of the tools provided are for. Specifically, the XY Calibration Tools are not mentioned in the printed guide that comes in the box.
However, an upto date PDF quick start guide, which also includes these tools in the accessories included section, as well as a description of how to use them, is included on the provided SD card.

I won’t go through the setup process, as you can follow the electronic startup guide. It’s also worth noting that the updated version of this guide isn’t on the Flashforge website, which seems odd, but at least it’s on the SD card.
Firmware upgrade
The first thing you should do with your unit, is to upgrade the firmware. I’d do this before the calibration steps too, as you’ll likely just have to re-do them afterwards anyway.
To upgrade the firmware, just connect the SD card to your computer, and create a folder called sys, then return the SD card to your printer.
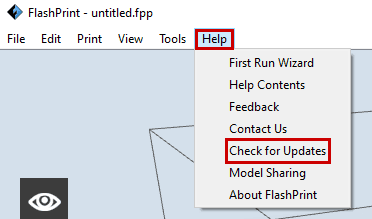
Connect the printer to your computer via the included USB cable, and open FlashPrint. If you haven’t installed it already, do so, but also make sure you update to the latest version via the Help > Check for Updates menu option:

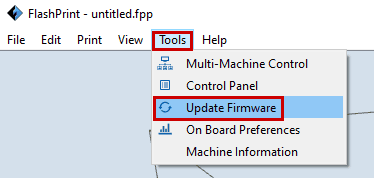
When the latest version of FlashPrint (V4.6.2 at the time of writing) is running, select the Tools > Upgrade Firmware menu option, and this will guide you to installing the latest firmware version (V1.7 at the time of writing) on your Flashforge Creator Pro 2.

After the firmware is upgrade, calibrate everything as per the quick start guide and touchscreen menu’s.
My first prints with the Flashforge Creator Pro
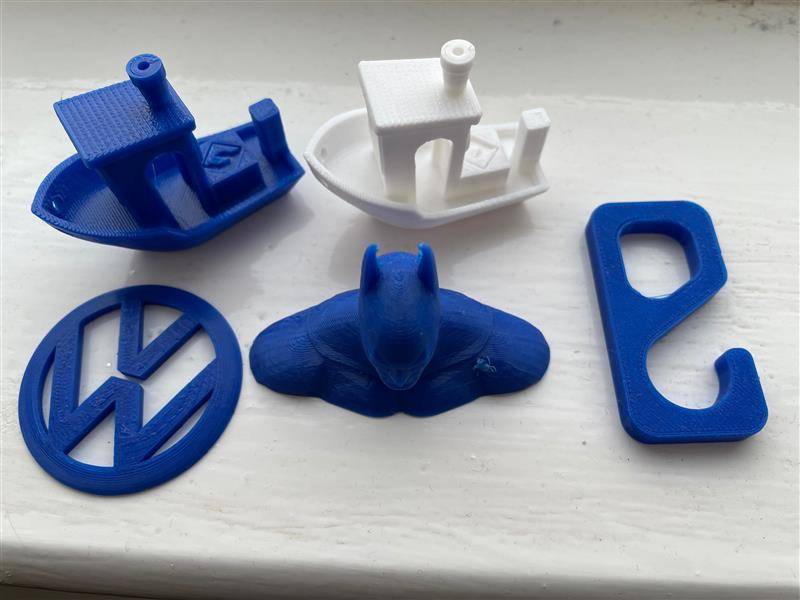
To get you started, Flashforge includes some test print files on the SD card. Mine had a benchy, the big head from easter island, and a hook. Here’s what mine printed like using the PLA that the unit came with, the VW logo and batman weren’t on the SD car, but were downloaded from Thingiverse:

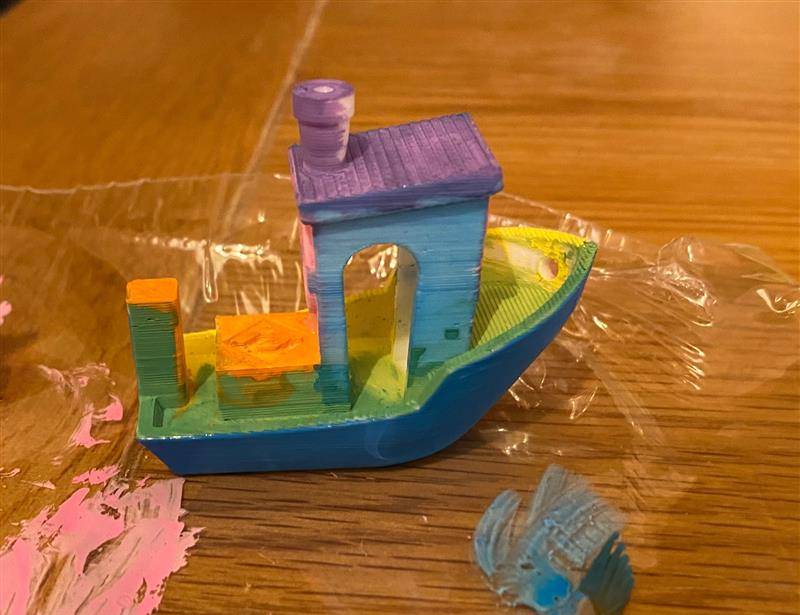
Also my daughter decided to paint the white benchy, with some acrylic paint pens 🙂

I printed a few more prints with the Flashforge blue and white, and noticed on my fifth print, there the left extruder wasn’t dispensing the PLA. This turned out to be because the printer had moved, and the spool was stuck on the wall behind it. So make sure your printer doesn’t move, mine was on a glass table topper, so it moved about a little with each print, and when removing the prints.

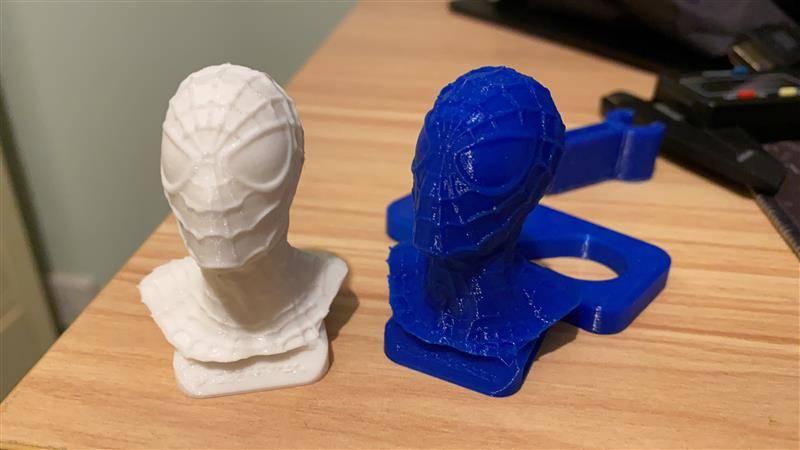
The below Spiderman models, also from Thingiverse, were done on a dual print.

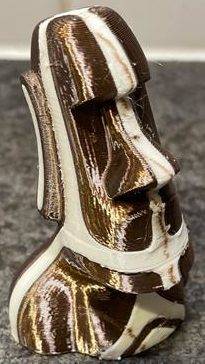
I soon got bored of the white and blue, so I purchased a roll of silky dark gold PLA from Amazon, and decided a dual colour print should be my first try with it. As you’ll see from the below, the colours merge together a little, but from a Facebook group, I was told that this was down to the temperatures being too high. I haven’t tried reprinting it yet, but to be honest, I still love this print.

Here are some more prints with the silky gold PLA:

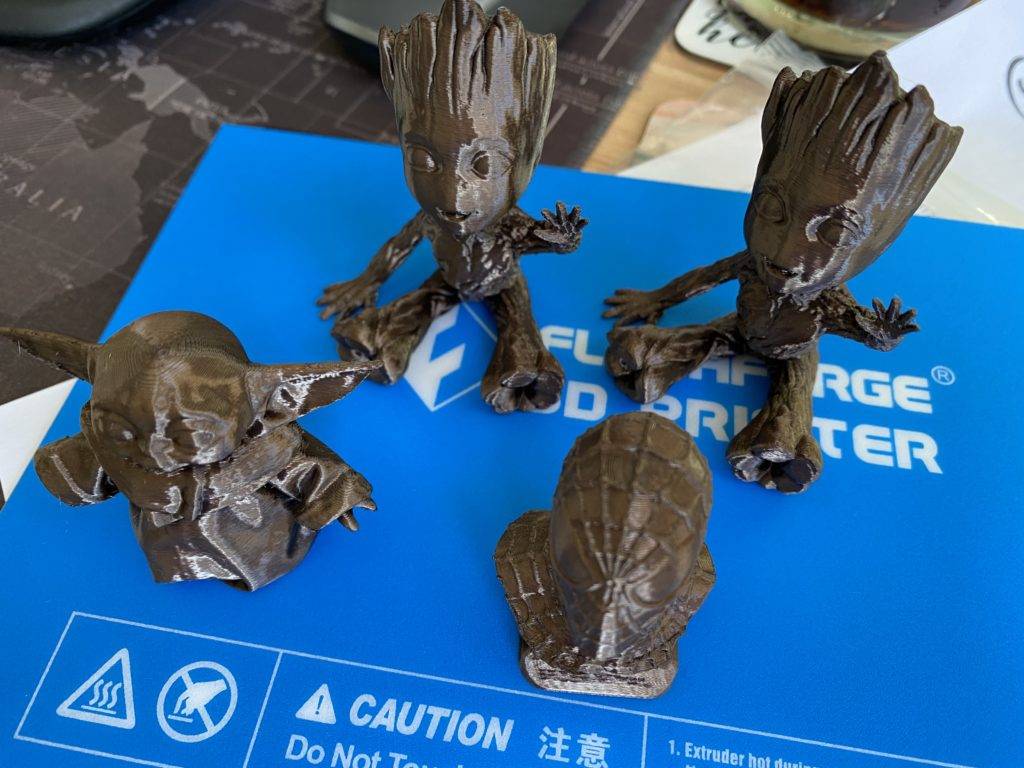
As you can see, the level of detail is great.
How to print your models on the Flashforge Creator Pro 2
Now I have started using OctoPrint, as I find it easier, and I can monitor it via a webcam, as well as record timelapse videos, but the easiest way to print your models, without any third-party addons, is via SD Card, by following the below steps:
Step 1 – Open FlashPrint
Step 2 – Import your model/s
If you don’t have your own models, download something from Thingiverse.com
Drag the .stl file into FlashPrint, and it will look like the below:

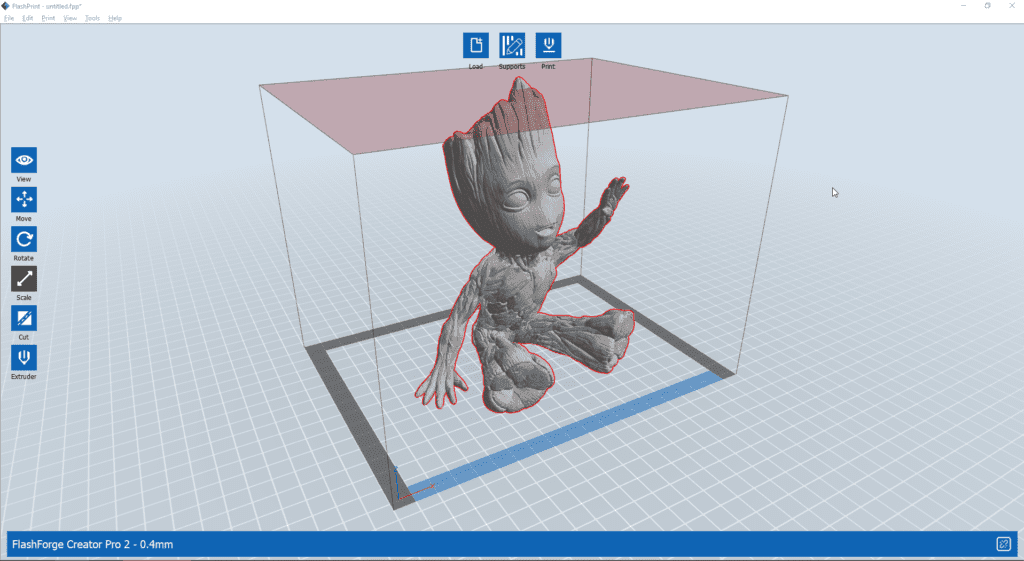
This model can be downloaded via: https://www.thingiverse.com/thing:2014307
Step 3 – Adjusting the model
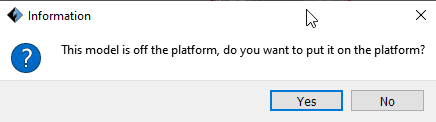
If asked if you want to place the model on the platform or centre it, I recommend saying yes.

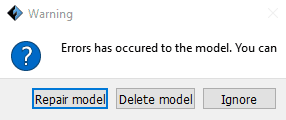
Sometimes it will advise there are errors, and if it does, select ‘Repair model’

For your first prints, start small, as it takes time, and the bigger you go, the longer it takes. So with that in mind, let’s change the scale by selecting the model, then the ‘Scale’ button to the left of the screen. Often I have to click it twice to see the options appear. If the options appear, but are blank, the model is not selected.

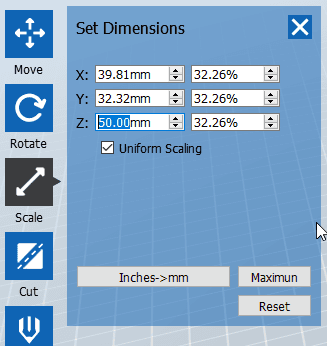
The measurements are in mm, based on my FlashPrint preferences, and the different options mean:
- X is the width of the model
- Y is the depth of the model
- Z is the height of the model
In the above screenshot, I’ve set the height to 50mm, which is 5cm. I wouldn’t go higher than that for your first prints, as you can see how it works quicker, with smaller prints.
You can rotate your models, if you want a different edge on the platform, but it’s not often that this is required.
Step 4 – Model supports
Sometimes, you will need supports for your model to print well. For example, if an arm hangs down, then supports help hold it up as it’s printed. You’ll learn what works and what doesn’t as you experiment, but for this one, I won’t use supports. If you do use supports though, I recommend the tree type and to print with a raft.
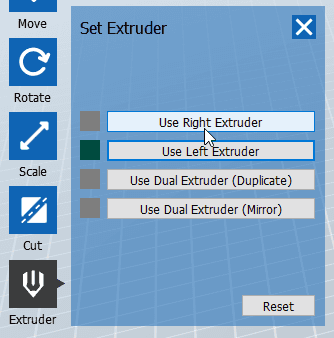
Step 5 – Select extruder and/or duplicate/mirror
Since this machine has two extruders, you can select which you use. Just select the model and click the extruder icon to the left of the screen and select your extruder of choice, usually dictated by the colour. You’ll notice the model changes colour depending on your selection, so you can easily tell which extruder will be used for the print.

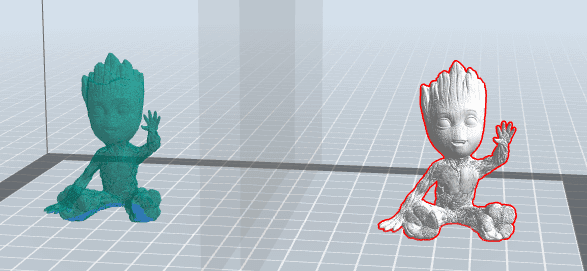
If you wish to duplicate, or mirror your model, and therefore print two at once, simple select the duplicate or mirror options, and the model view will change to something like the below:

Step 6 – Creating/exporting the .gx files
When you’re ready to print, click the print button at the top of the screen, and you will be presented with options. The best thing to do here, is experiment, but the out of the box settings are pretty good, in relation to temps and speeds, but I have noticed the silky dark gold PLA, works better when tweaked as per the below. I’m not using support or a raft for this one, as I know or think it will be ok.

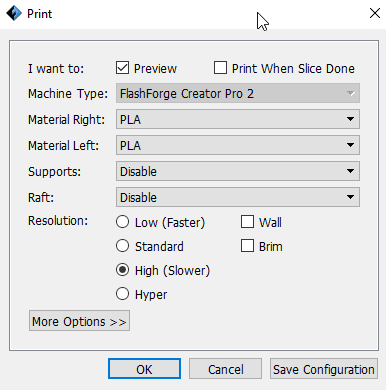
When you click ‘More Options’, you can customise the settings, if you are comfortable doing so. Here are the customer settings I changed:

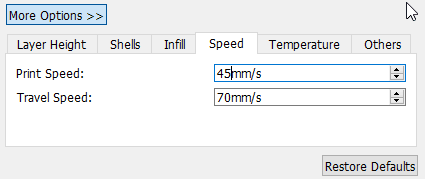

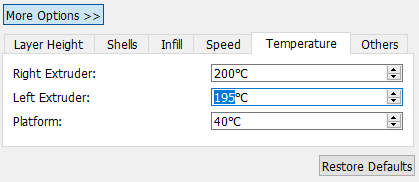
You’ll see I’ve set a different temperature for the left and right extruders, this is only because they are different types of PLA, and I believe these temperatures work better for them. This will be very much trial and error, until you see the results for yourself, when printed.
When you’re ready, click OK, and the software will process the model/s and calculate an estimated print time. I find the estimates are good, and generally only out by around 5-10 minutes.

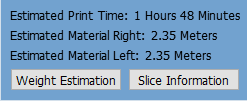
The print time may put you off, if it’s a long one. If it does, just click the back button at the top of the screen, and consider a smaller size model, and perhaps not as high a quality, and try again.
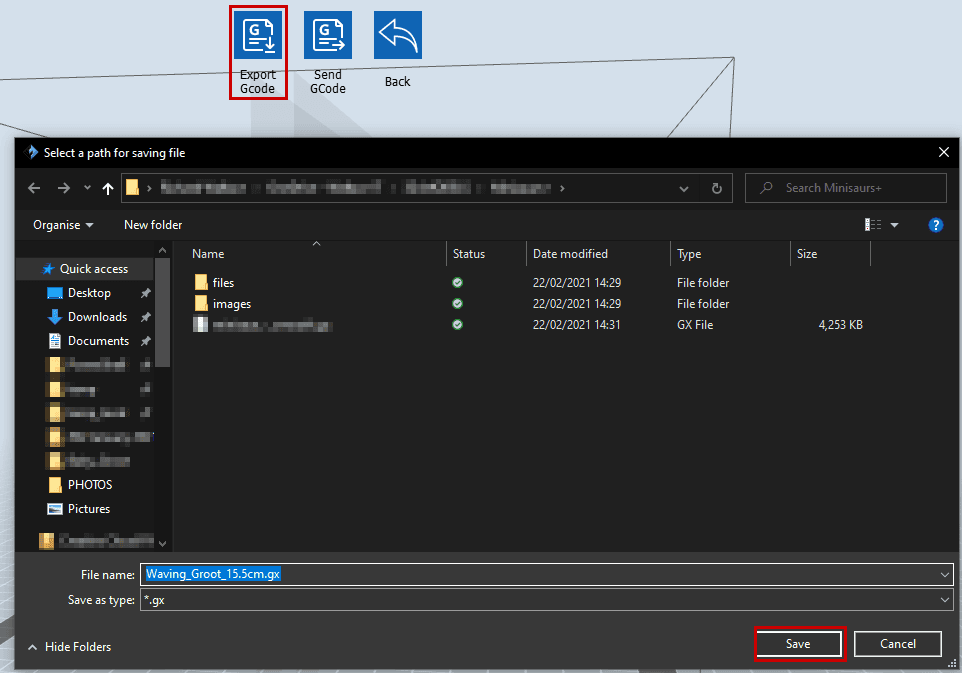
When you’re ready, and are ok with the print time estimates, select the ‘Export Gcode’ button at the top of the screen and save the file to your SD card.

Step 7 – Printing
Insert the SD card into your printer, go to the home page select ‘Print’, select your SD card, and finally select the file you just selected.
Step 8 – Wait for it to finish
Now as you know already, this part can take a while, but it’s best to watch the start, to make sure the filament is sticking to the base plate ok. I had a couple where it didn’t, and this was because the base plate level was off. I think the force required to remove the models from the stock base, unlevels it a bit. So I recommend a removable plate, as your first modification.
Flashforge Creator Pro 2 – Pros and Cons
Pros:
- IDEX (Independent Dual Extruders) – this allows you to print two of the same model, at the same time, or to print with two colours in the same model.
- Works well out of the box.
- Enclosed, with a top cover that you can leave off, if you wish.
- Prints well out of the box.
- No building required, just minimal effort, a firmware upgrade, and some calibration.
- Built in light, which helps to see your prints. Although it would be nice to be able to turn it on and off whilst a print is underway. You can turn it off and even change the colour in the menu though, just not when it’s printing.
Cons:
- It’s quite noisy. Not too much to put you off, but if you’re in the same room as it, you wouldn’t want it printing all day long.
- Prints are hard to remove. I did find that using disappearing glue helped, but that was short lived. So instead, I’ve bought a flexible build place for mine.
- Big case for such a small build size.
- No auto levelling.
- Default temperatures from FlashPrint seem on the high side, although they do mostly work, I think the results are better when they are lowered to 200 degrees C for PLA, sometimes as low as 195.
- No built in web cam.
- Feels very old school. You have to print via an SD card, or by connecting it to your PC with a USB cable.
- No IP connectivity, so you cannot connect to it using wi-fi or ethernet. Instead, you have to use something like OctoPrint, which connects to the USB port.
- Not enough control over the settings. I would like to disable the annoying beep on startup, print finish etc.
Conclusion
In conclusion, although there are more cons than pros, they are mostly minor, and I love this printer. So far have used it all day, and every day since it arrived. I would definitely recommend it, as long as you know the cons, and can live with them. The only think I’d say is required, is the flexible build plate, and I think Flashforge should consider including it with the machine as standard.
If you’re looking to buy one, try Amazon, as they seem to have them in stock right now and at a good price too.