

If you’re reading this article, I’m presuming that you know what Pi-hole is, and have a Raspberry Pi setup with Docker installed.
Pi-hole features and benefits
I think the main reasons most people will install Pi-hole is to block ads, increase privacy, and for added security, but here’s a list of features an benefits, if setup correct and maintained:
- Block ads on your devices (e.g. ads on web pages, in apps, video ads on YouTube, ITV player, even on your TV, etc).
- Help to remain secure by preventing malware and phishing attempts.
- Block scam websites.
- Improve privacy.
- Prevent tracking.
Install Docker Compose
To check if you have Docker Compose installed, run the below command in a terminal window:
docker-composeIf you see the below response, run the below command to install Docker Compose:


sudo apt-get -y install docker-composeCreate a Pi-hole Docker Compose Manifest
Create and navigate to a new folder using the below commands in a terminal window:
mkdir /home/pi/pi-hole
cd /home/pi/pi-hole

Create a new file using the below command:
nano docker-compose.yml

Update the below with your password, and then paste it into the new file you created:
version: "3"

# More info at https://github.com/pi-hole/docker-pi-hole/ and https://docs.pi-hole.net/
services:
  pihole:
    container_name: pihole
    image: pihole/pihole:latest
    ports:
      - "53:53/tcp"
      - "53:53/udp"
      - "67:67/udp"
      - "80:80/tcp"
      - "443:443/tcp"
    environment:
      TZ: 'Europe/London'
      WEBPASSWORD: 'EnterYourSecurePasswordHere'
    # Volumes store your data between container upgrades
    volumes:
      - './etc-pihole/:/etc/pihole/'
      - './etc-dnsmasq.d/:/etc/dnsmasq.d/'
    # Recommended but not required (DHCP needs NET_ADMIN)
    #   https://github.com/pi-hole/docker-pi-hole#note-on-capabilities
    cap_add:
      - NET_ADMIN
    restart: unless-stopped
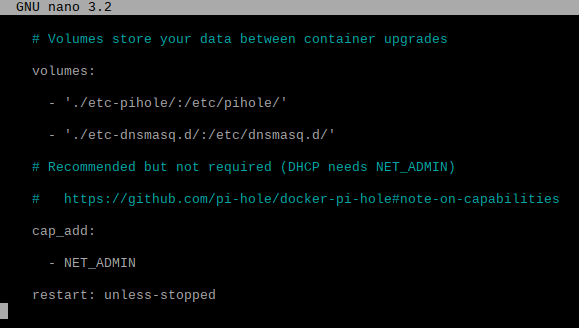
Press CTRL + X to close the editor


When prompted about saving the changes, press Y for Yes.


Press enter, without changing the file name.


You will return to the terminal window after the updates are saved.
Installing Pi-hole in a Docker container
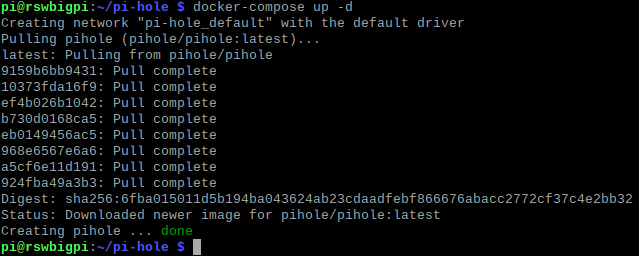
In the same folder as your newly created docker-compose.yml file, as detailed above, run the below command to create a Pi-hole Docker container:
docker-compose up -d-d is used to set the container to run as a background process.
You’ll see it start to download the files and install them, please be patient.
When you see the below, the Pi-hole Docker containter is installed.

View your Pi-hole Docker container
You can view your containers by running the below command:
docker psIf you don’t see your containter, try appending an -a to show all containers, even those not running.
docker ps -a

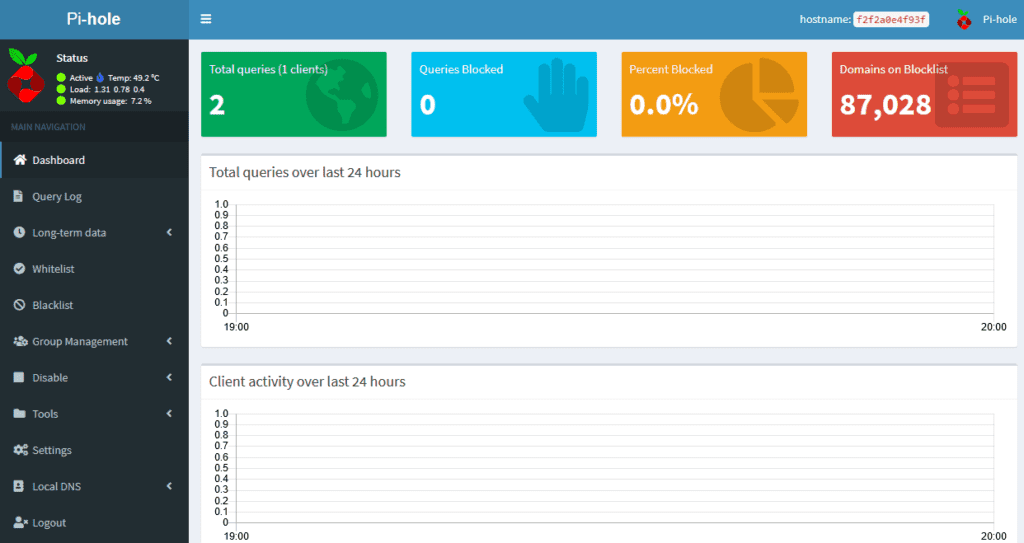
If everything is running, you can now start using Pi-hole by browsing the admin portal:
http://servername/admin
You will need to use the password that you saved in the docker-compose.yml above, when authenticating with Pi-hole.

When you’ve configured it, don’t forget to set your server up as the DNS server, and consider setting it as a DHCP server too. You could also keep your DHCP server, and setup Pi-hole on two Raspberry Pi’s, and set them both as DNS servers, to give you some redundancy.