

Hopefully this won’t spoil the article for you, but I’ll start off by saying that the Bambu Lab X1 Carbon 3d printer is fantastic, it looks great, prints well, and I love it.
It feels like Bambu Lab is the Apple equivalent in the 3D printing world, and I compare the two because the machines look great, and they’ve really thought about the end user. Many will argue that the Bambu Lab machines are too locked down, but that doesn’t bother me, so I won’t even touch on it in this article.
I’ll also point out that I’m not a 3D printing professional, and this article is not influenced by Bambu Lab, in fact I imagine they don’t even know who I am. I am just sharing my views on this printer, in a hope that it will help others know what they are buying.
Table of Contents
Things I like about the Bambu Lab X1 Carbon
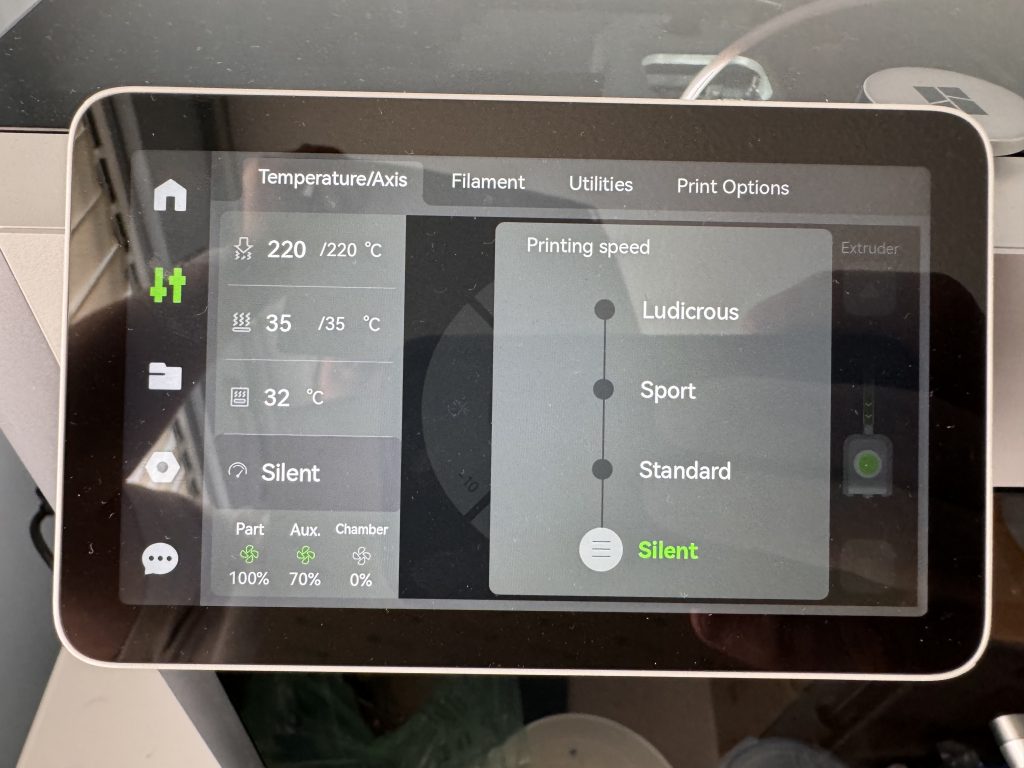
1) The user interface
The user interface on the device is really easy to use, and quite intuitive.
The below image is the home screen, where you can see what’s printing, it’s progress, the printers status and some basic controls to pause/stop prints.

The settings tab is as you’d imagine, settings for printer speed, temperatures, loading filament, calibration etc.
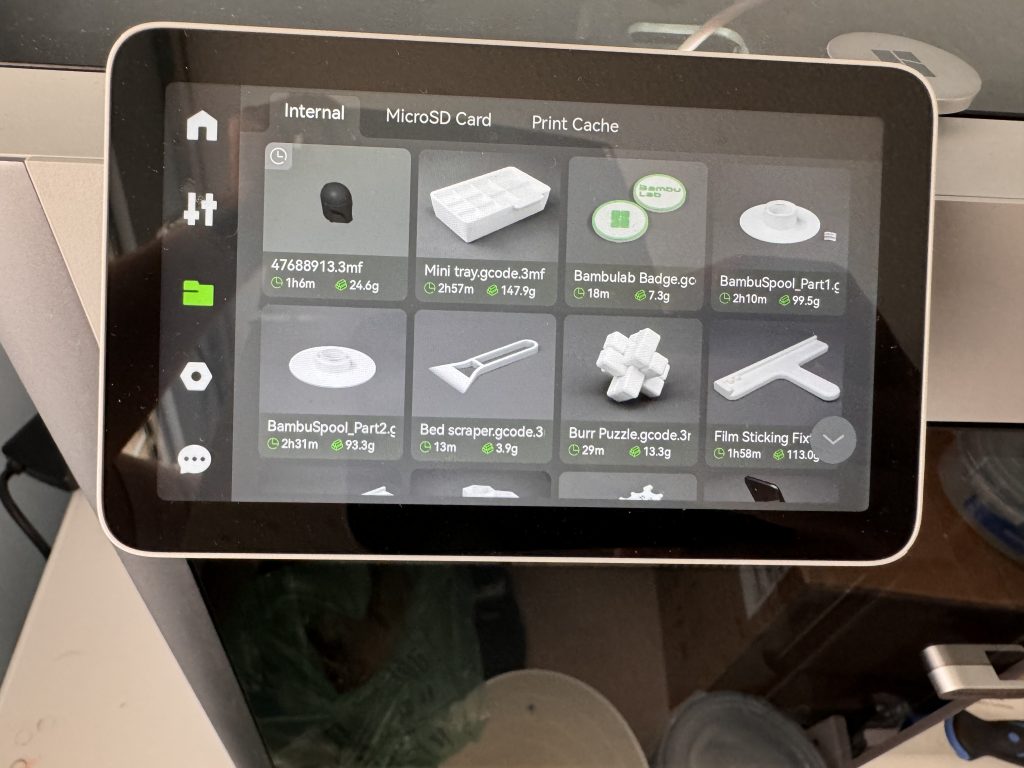
The next one is where you can access files stored in memory or on the memory card.
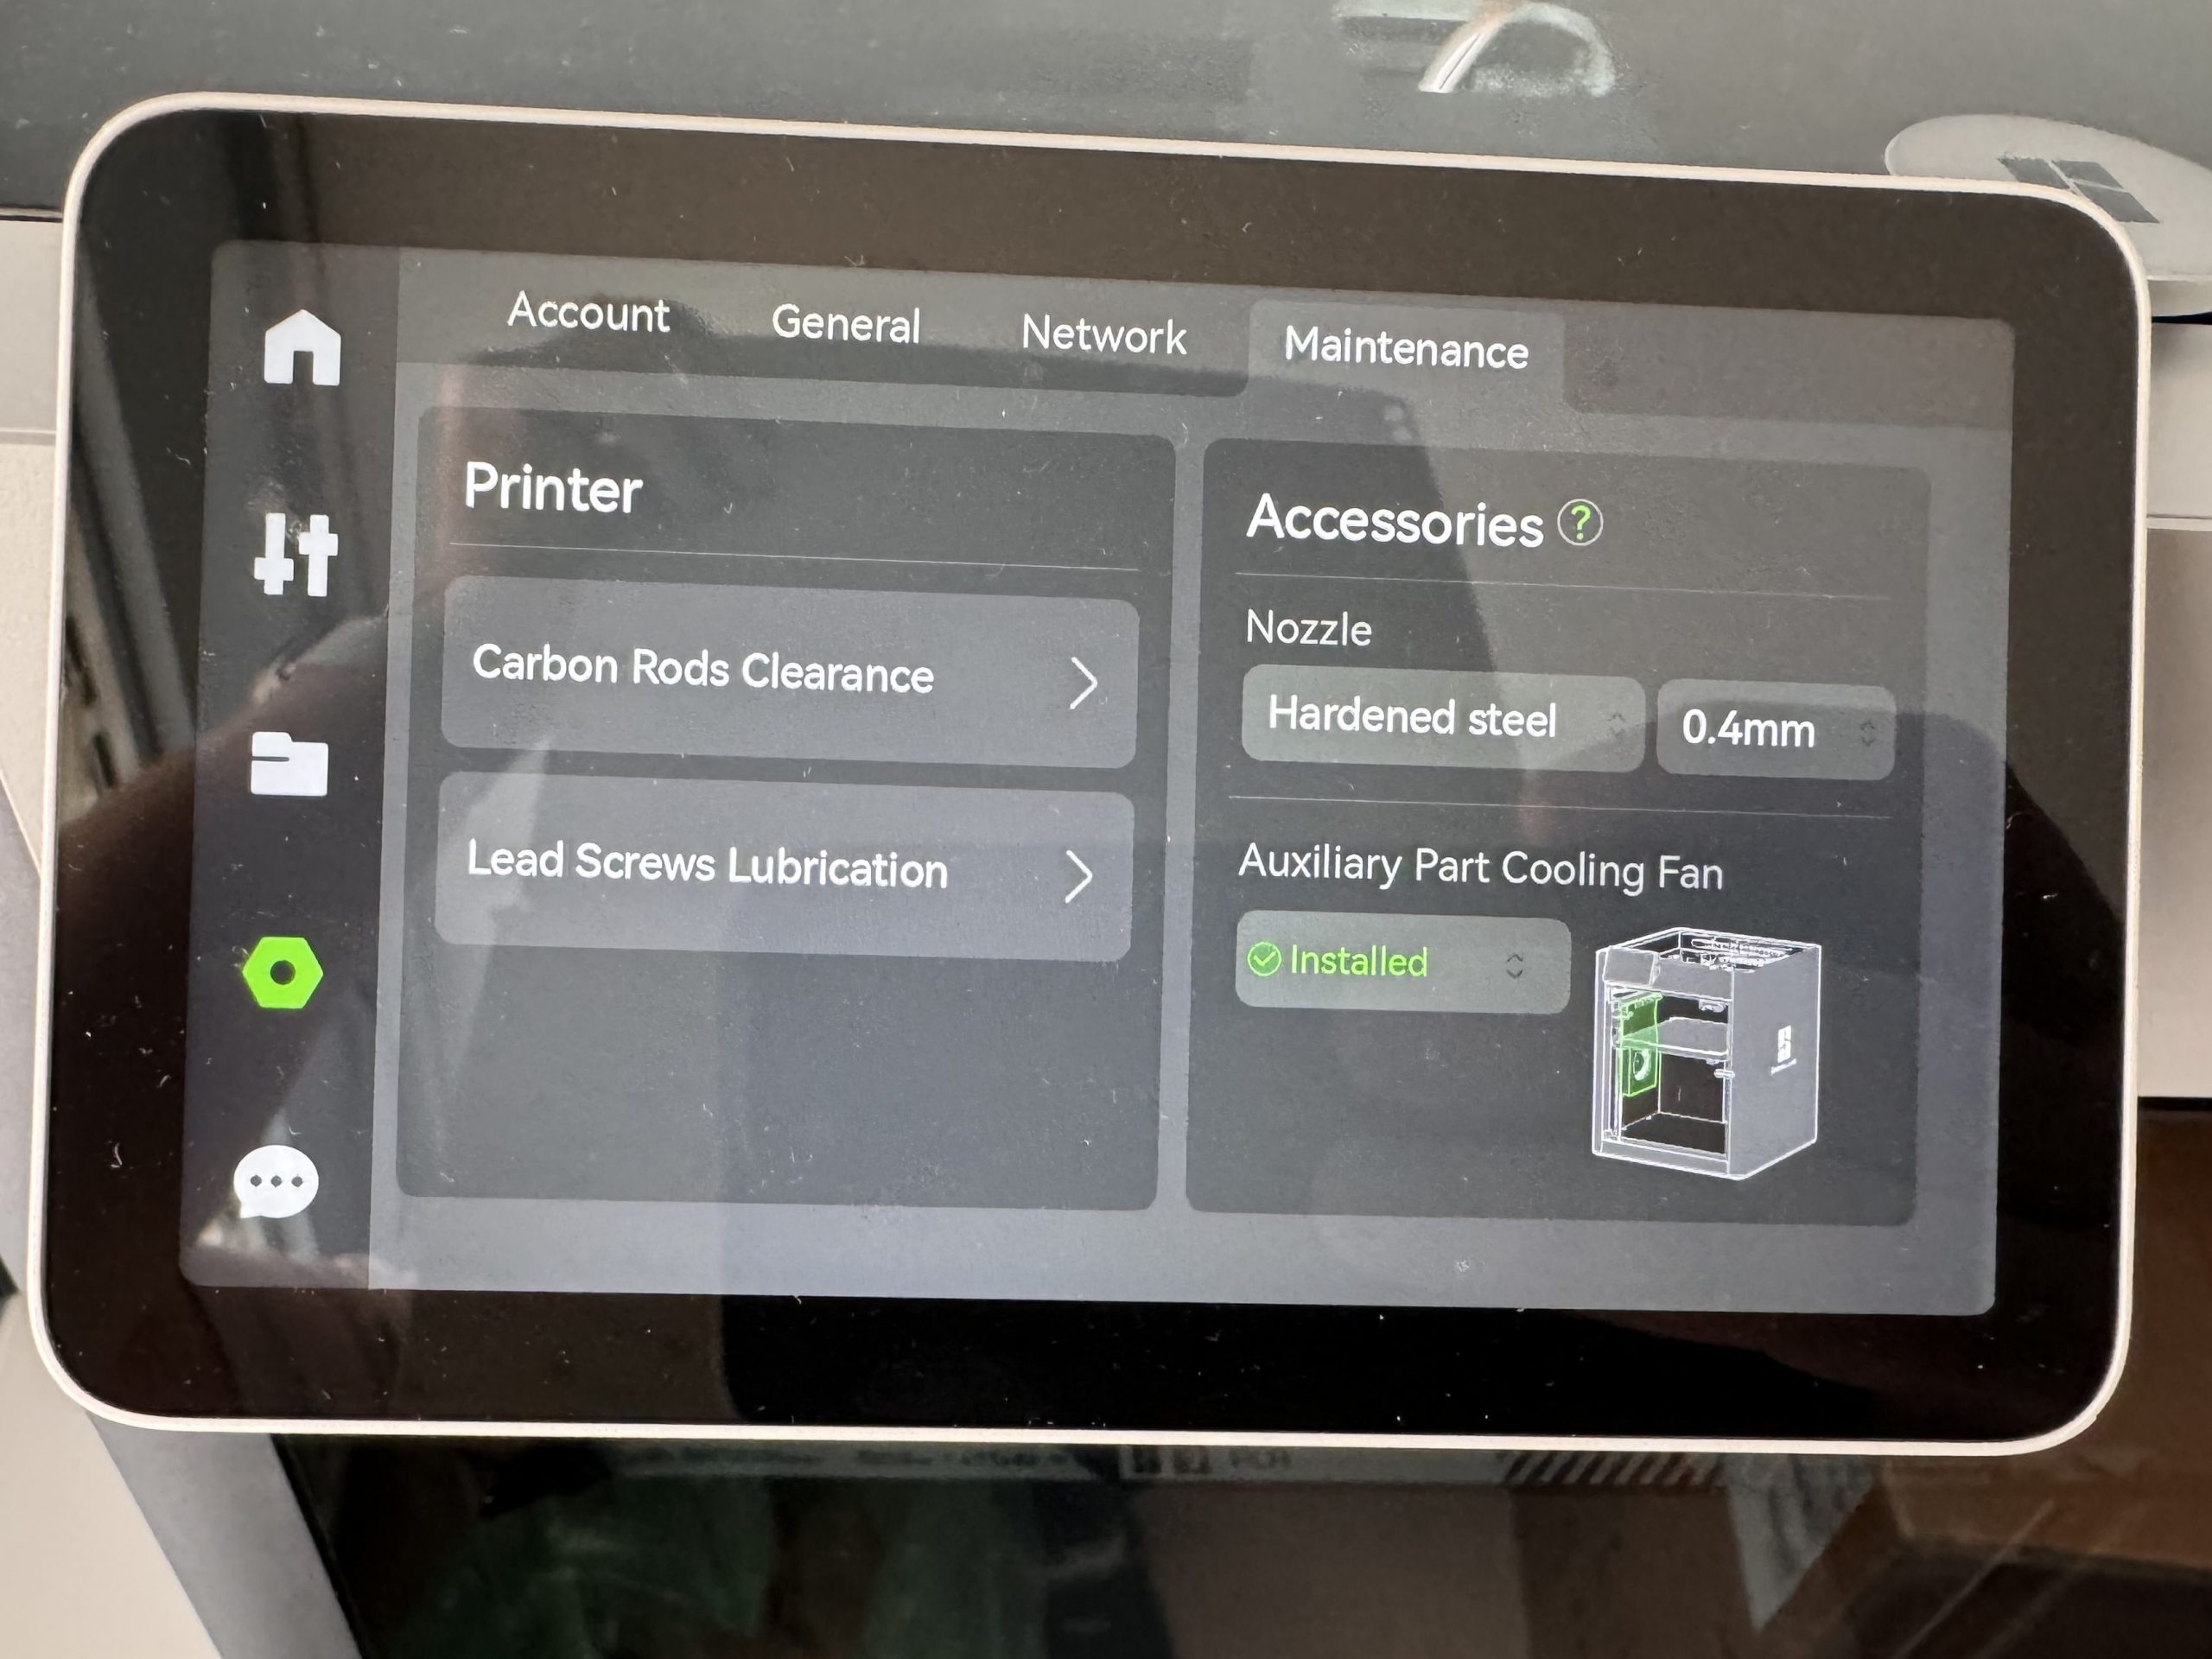
The next tab is a maintenance one, which will walk you through the steps required to maintain the printer, and you can also change the nozzle settings, if you also change the nozzle size.
There is a final one, which is a notifications / help menu, but I didn’t take a photo of that one.
2) The speed
It’s quick, really quick, and for the most part with no loss in the quality, although I did find if I print the example bency, it’s not perfect, but does improve when the speed is lowered. I tend to just use the silent (50%) and normal modes (100%), but I’m sure I’ll use the faster modes (sport (124%) and ludicrous (166%) as I use the machine more.
I’d estimate that this is about 3-4x quicker than my FlashForge Creator Pro 2, and that’s just using the X1 Carbon’s Normal (100%) mode.
3) The slicing software
The Bambu Studio software is great. It does take a little getting used to, but within a few minutes, and perhaps a YouTube video or two, you’re up and running and using it with no problem.
One of my favourite things about it, is that it knows what settings to use based on the filament that you have loaded, so it saves you a lot of time and hassle. I’ve even found that to work when not using the Bambu filament too.
Another great feature, is the ability to use the tools to highlight parts of thse model to print in a different colour.
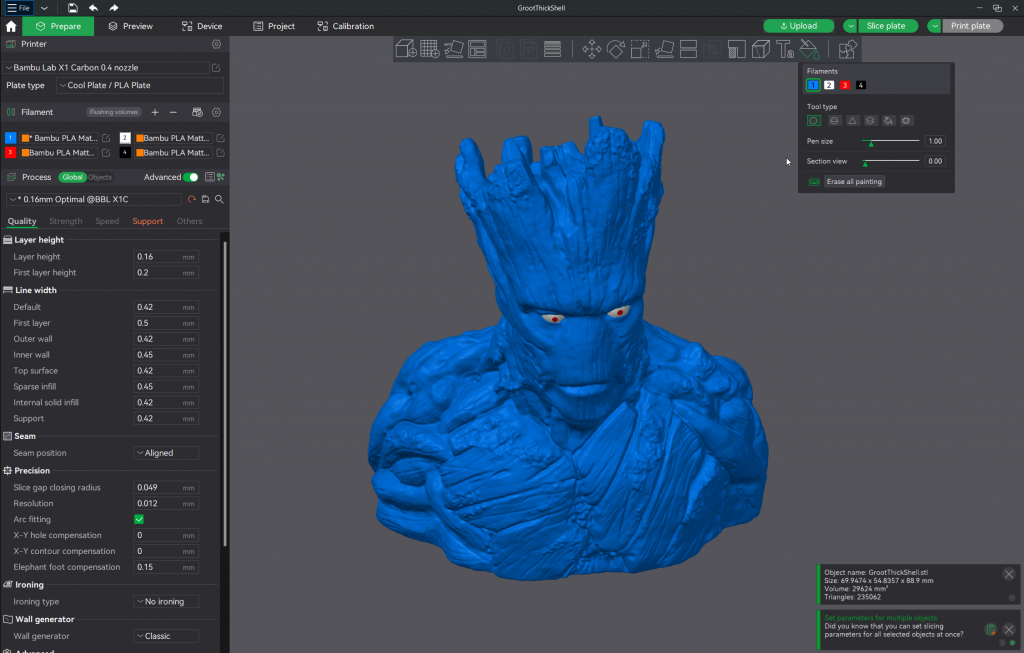
You can download the Groot model from Maker World.
The same is true when it comes to supports, you can use the tools to mark where you want or don’t want supports, and I keep finding new things each time I use it. Compared to Flash Print, which I use with the Flash Force Creator Pro 2, this is leaps and bounds ahead and does much more.
4) The mobile app
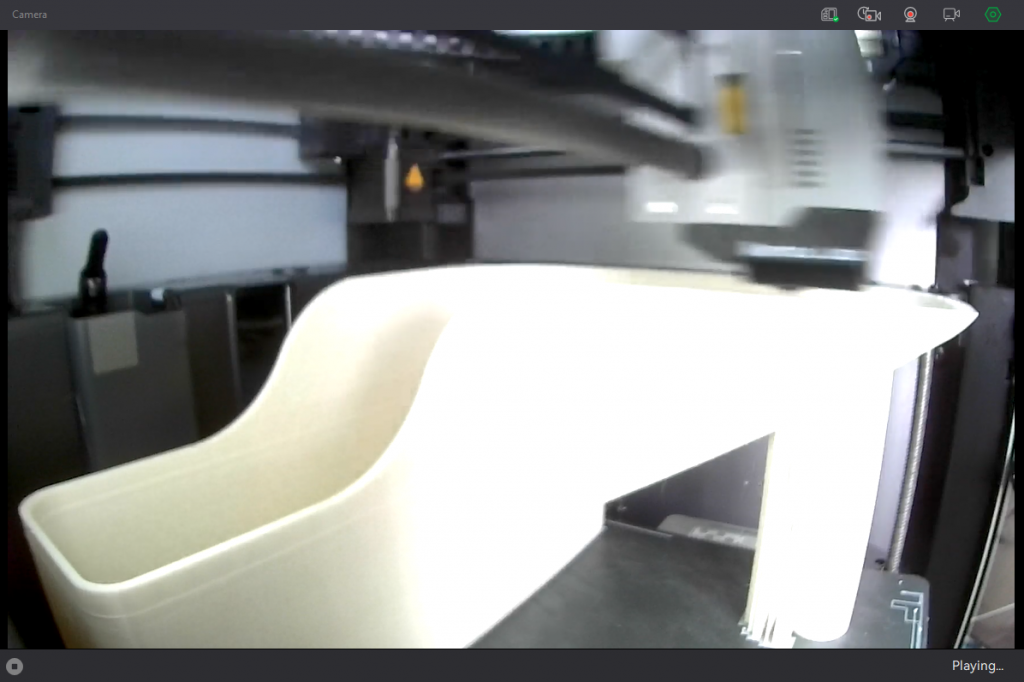
The mobile app is fantastic. Not only can you view the progress of your prints via the camera, but you can control the printer settings (temperature, speed etc) and even start a print remotely by selecting a model from Maker World. You can watch a brief demo of the printing aspect below:
You can download the Harry Potter Hogwarts model from Maker World.
One thing I wish they’d change though, the ability to alter the defaults for prints. For example I always want a timelapse video, and I often forget to check that option, so have to cancel the print and start it again.
5) Maker World
There are plenty of places to download 3D models, but what makes Maker World different, is the fact that it integrates to well with the software (Bambu Studio) and mobile app (Banbu Handy). You can browse the mobile app for a model, and just print it, without the hassle of downloading files, copying them to the printer etc (see the video above).
It’s a little different on the computer, as you browse the websites and for some you do have to download the files, and drag them into Bambu Studio, but for others, where the author or someone else has uploaded a profile, you get a nice ‘Open in Bambu Studio’ button that loads the model in, and adjusts the settings. These are what makes it for me, as they’ve spend the time to get things right and that means all you have to do is print it.
6) How it manages materials
When you load the filament, you select which brand/generic, and the type (e.g. PLA, PLA silk, ABS etc), and this prevents you printing with the wrong material, and also prevents you using the wrong side of the build plate. It also manages the bed and head temperatures too, which so far seems to have been spot on.
If you have an AMS (Automatic Material System), you can set this per compartment too.
7) It’s cleaver
It’s pretty smart, and warns you about failed / failing prints, and here’s a couple of things I’ve experienced:
a) I set a print to ludicrous, and it didn’t pan out and the app warned me that there was lots of stringing, so I could cancel it remotely.
b) I’ve seen it inspect the first layer, to give your print a good chance of succeeding.
c) It warns you if you have the wrong build plate in place, other than specified in the slider
d) It warns you if you try to print with a filament other than specified in the slider
e) The skip object feature (in the app and on the printer screen) allows you to stop printing an object if it goes bad. This will be extremely useful if you print multiple things at the same time.
8) It’s connected
I know I’ve losely mentioned this already, but the fact it connects to your wi-fi network is one of the most convient things of all, and essential too. You can send the files to print without having to copy files to a memory card, and I often realised I’d messed up and would have to do it again. I don’t know why some manufactures, FlashForge (cough cough), are so slow to do this. It really put me off printing with the Creator Pro 2.
10 things I’d like to see improved on the Bambu Lab X1 Carbon
1) Camera quality
The it says the camera can do 1080p, but I find it not to be all that good. It struggles to focus when you print bigger objects, and can’t manage the exposure effectively. It’s a bit better when you print smaller and darker objects.
You can see from the below screenshot that it’s a bit soft and out of focus.
It’s by no means a deal breaker though.
2) Disappoint bency sample
I don’t print the bency too often, but I thought I’d try it, after seeing many others online do it, using the default one on the machine. It was super quick, but the quality of the print changed part way through, and you’d think they’d make these samples show the printer at it’s best.
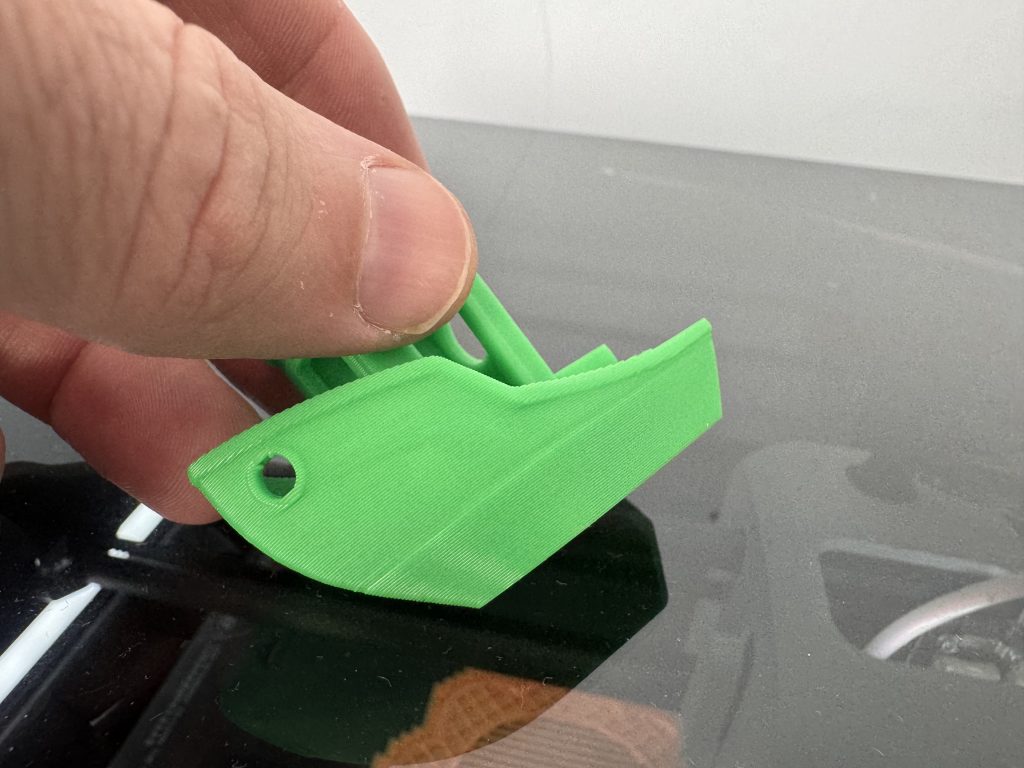
It was super quick though, and if you slow it down, prints a bit better. If you adjust the speed and settings yourself, it does print ok though, but I suspect the model is at fault here, and not the printer. I’m just surprised they didn’t include a better version to showcase the printer better.
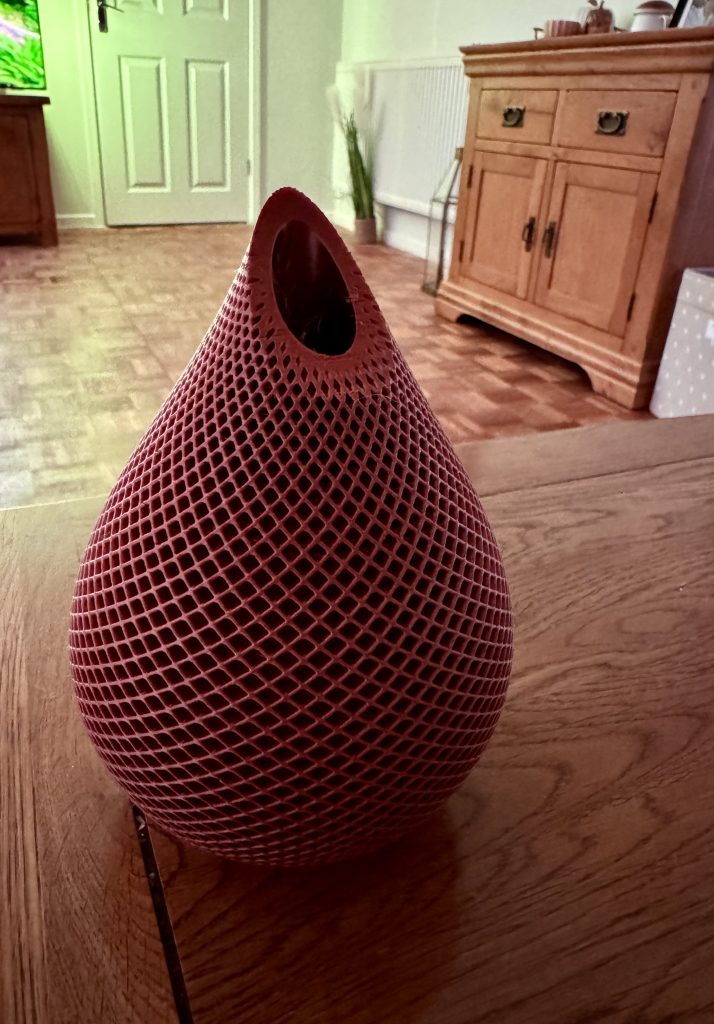
The other samples, well the ones I’ve done, seem to print well though, including this vase, which I printed with a copper coloured Silk PLA.
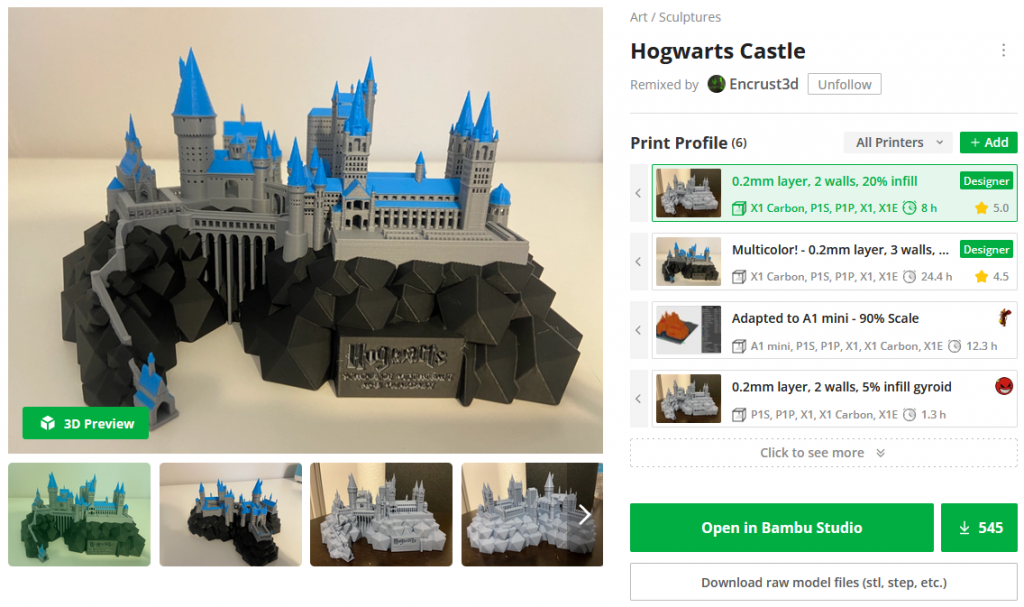
I also printed the below model of Hogwarts, which came out better than I could have hoped, it’s perfect!
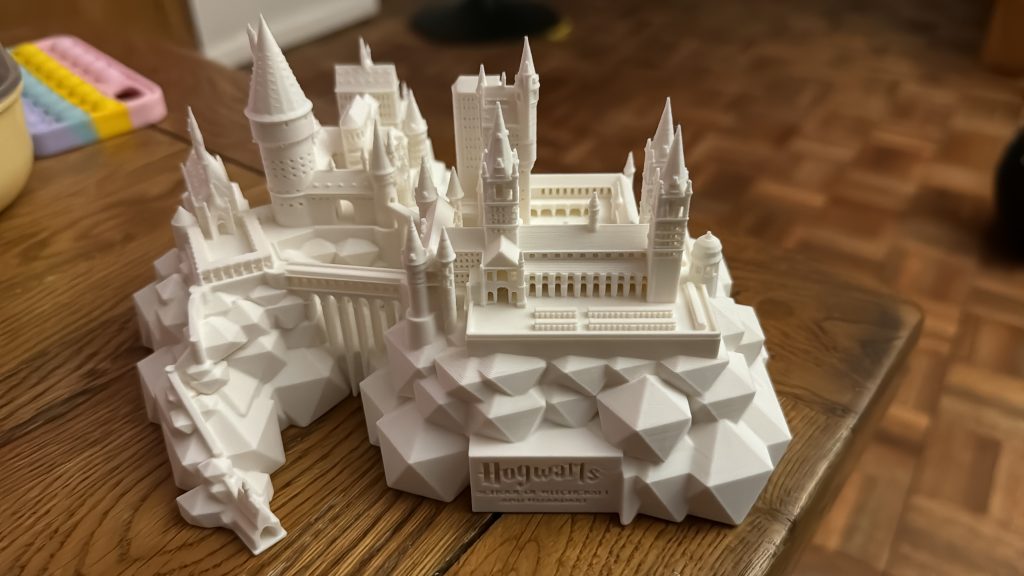
You can download the Harry Potter Hogwarts model from Maker World.
3) No memory card included
I was surprised that there was no micro SD card was included, you’d think they’d include on, even if just a 32GB one. You need one of these to use the video capabilities, and I went for the SanDisk 512GB Ultra U1.
4) Waste materials and management
There’s quite a lot of waste when changing filaments, but I don’t see how they could avoid that, as you need to purge the old filament before printing with the new one. However, just throwing it out of the back isn’t ideal.
I ended up printing a filament poop bin (the designers name, not mine), to catch it, and that works really well. You can download the model from Maker World.
5) Lighting
The built in light isn’t the best, but it’s also not the worst. I’d like more light in the chamber, but it’s not bad enough for me to add more lighting myself.
I believe Bambu Labs have limited the light, to not interfere with the lidar, which is another reason why I won’t be adding more lighting.
Also, the light does not turn off when the unit goes into standby, which seems very strange for a company that is concious about sustainability.
6) Silent mode
Although the silent mode does reduce the noise, it’s still quite noisy, so I can’t leave prints running overnight, like I used to with my FlashForge Creator Pro 2.
When in silent mode, it runs at 50%, according to the app, so I’d like to see an ultrasilent mode which might run at 20-25%, accepting that prints would take longer.
7) The glass lid
It’s a shame that it’s not hinged, as when I take it off, I have to store it somewhere safe, so it doesn’t fall and break. Although saying that, I’m not actually taking it off too much as it’s not the warmest climate at the moment and the AMS gets in the way of doing that too.
8) The build plate
The build plate is ok, but even when using adhesive, as recommended, it’s not ideal and I have found some issues with PLA breaking as it sticks to the plate. So I’ve had to fork out another £35 for a textured alternative, which I hope will work better.
9) It’s loud
I got mine without the AMS originally, and I thought that was noisy in comparison to my old FlashForge Creator Pro 2, but when I put the AMS on top, it got even worse. The weight of the AMS on top of the glass results in much more noise when the unit vibrates, even after doing the calibration again. You can see what I mean by viewing the below video:
I know the unit is fast, but there’s definitely more that could be done to resolve this. For example, different stepper motors, some insulation and quieter fans.
Someone did recommended that I look at a concrete block and foam pad to help with this, which I have done, and you can see the results in the below video. But why should I have to do this, other manufacturers seem to managed, the FlashForge Adventurer 5M Pro for example appears to be a little quieter, although other reviewers have said not by much, so perhaps it’s just a side affect to the increased speed, but I still think my comments are still valid and it could definitely be made quieter.
With all that said about noise, I still love this machine and would recommend it.
10) Only a partial standby mode
I like that the screen goes off when it’s not in use, and when the printing stops it goes into a standby mode where the fans turn off, but why does the light not go off? It bugs me, so I’m using a smart plug to turn the printer off completely, otherwise I might be out and the light is on for hours without needing to be.
Ideally I’d like to see Bambu Labs turn the light off when it’s in standby, and automatically turn it on as you wake it up by tapping the screen etc.
Conclusion on the Bambu Lab X1 Carbon
I’ll keep it simply. This is an incredible 3D printer, and I can’t recommend it enough. I love it so much, and I’m happy to to continue sharing more information with you via some additional photos and prints, if that would help, just comment with your requests.
One word of warning though, it’s addictive. I’ve had a 3D printer for years, but they weren’t as simple to print with, but Bambu Lab have made it is simple with this machine and the quality it outputs is really good, and that makes me want to keep printing. I initially just got the X1 Carbon on its own, thinking that’s all I needed, and it probably was. But I was jealous seeing the multi-colour prints, so I got myself an AMS a few days later.
I’d love to get my hands on the A1 mini too, as that looks like a great machine, but I don’t see me making that purchase any time soon, as this machine is perfectly capable of keeping me busy and entertained.
I love my x1c as well. I actually made 2 different risers for mine. The first was to install lights. The model required buying a control box which will even turn red if the print has a problem. Turn green when print is done. Will turn completely off when the lidar is on. Sounded great. Mine didn’t work. But the light does give more light. I found white also glares the camera. Warm white works great and since it doesn’t change color or anything else. The second riser has air vents so I don’t have to open the door on high temp prints. And having to spend the first 2 weeks printing upgrades did help with the overall enjoyment once they were all in place.
I love my X1C too, and your mods sound good. I’ve done a couple, but couldn’t wait to get printing helmets etc, so my mods will have to wait a little.