Out of the box, OctoPrint / OctoPi works with ethernet, but to run it over wi-fi, you need to make a few simple changes. So let’s get started:
Step 1
Connect your OctoPi Micro SD card to your computer.
Step 2
Find the octopi-wpa-supplicant.txt file, and open it in Notepad++.
DO NOT OPEN THIS IN NOTEPAD
Notepad doesn’t take into account the line spacing being different on Linux, and it will break your installation.
Step 3
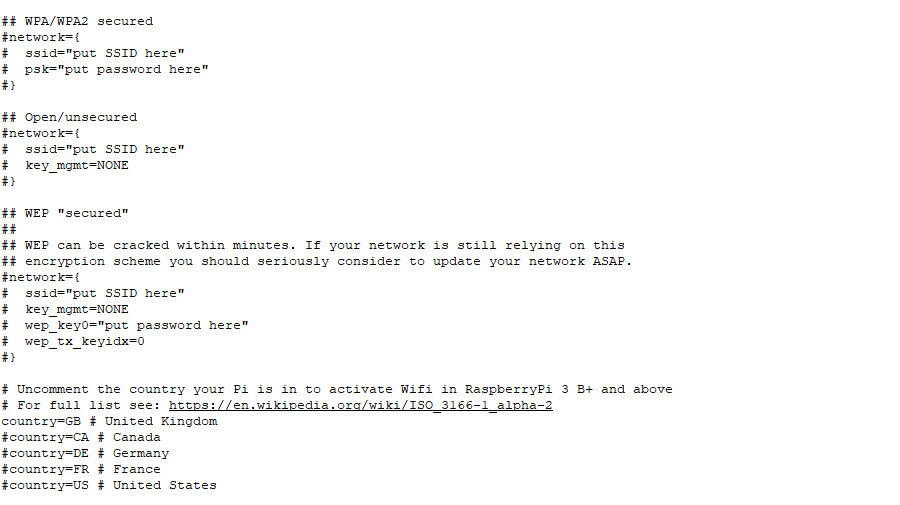
Find the WPA/WPA2 secured section, and add your wi-fi name and password, as shown in the example below:
## WPA/WPA2 secured
#network={
#  ssid="mywifi"
#  psk="mypassword"
#}
Step 4
Check the country selection is good, as per the below, but for the country you are in. Just comment out the wrong ones with a # and remove the hash on your country.
# Uncomment the country your Pi is in to activate Wifi in RaspberryPi 3 B+ and above
# For full list see: https://en.wikipedia.org/wiki/ISO_3166-1_alpha-2
country=GB # United Kingdom
#country=CA # Canada
#country=DE # Germany
#country=FR # France
#country=US # United States
Step 5
Save the changes, eject the memory card, add it to your Pi and start up your device.
You should now be able to view it via http://octopi.local
Frequently asked questions
How can users troubleshoot common connectivity issues if OctoPrint/OctoPi fails to connect to Wi-Fi?
To troubleshoot common connectivity issues with OctoPrint/OctoPi, start by verifying that the Wi-Fi credentials in the configuration file are correct. Ensure the Raspberry Pi is within range of the Wi-Fi network and reboot both the router and the Raspberry Pi. Use a tool like ping to check network connectivity and review the OctoPrint logs for error messages.
Are there any security considerations or best practices for securing the OctoPrint/OctoPi setup over Wi-Fi?
For security considerations, it is essential to change the default password of the OctoPrint web interface and enable SSL for secure connections. Use a VPN if accessing the OctoPrint server remotely and regularly update the OctoPrint software to patch any vulnerabilities.
What are the recommended Wi-Fi settings or router configurations to ensure optimal performance and connectivity for OctoPrint/OctoPi?
Optimal Wi-Fi settings for OctoPrint/OctoPi include using a 2.4 GHz network for better range, setting a static IP address for the Raspberry Pi to ensure consistent network access, and ensuring the router’s firmware is up to date. Adjusting the channel settings to avoid interference from other networks can also improve connectivity.


You forgot to mention uncommenting the network lines.
Also, “sudo nano” works fine via SSH.
I opened it with regular notepad 🙁
not working over here.
should I remove the # before every line ?
how exactly ? which lines ??
thanks
Henk
Yes, the # comments out the line. If you want to use those lines, please remove the hash/es