
We all make mistakes, and sometimes making too many changes in your code, between commits can mean that you lose hours of work. However, if you use VS Code (Visual Studio Code), then it has a built-in timeline feature, which offers a robust solution for navigating and recovering files between commits. This functionality is particularly beneficial when you need to revisit earlier versions of your work or undo changes after a misstep. Here’s a step-by-step guide on how to use the VS Code Timeline to manage and recover files effectively.
Prerequisites
For this to work, you need to make sure that your project is under version control with Git. VS Code’s Timeline feature leverages Git’s versioning capabilities, so having Git installed and configured is a prerequisite.
How to access the VS Code timeline
Viewing the timeline, is actually very straightforward, as you’d hope:
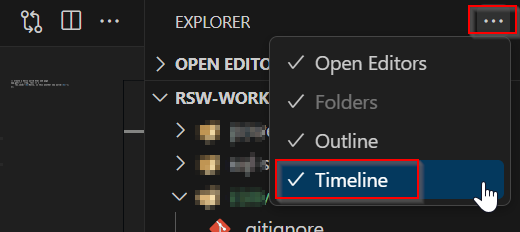
1) Select the ‘Explorer’ item from the side menu

2) Select the three dot menu to the right of the explorer title, within the explorer section of the sidebar and make sure ‘Timeline’ is enabled
3) Open the file you want to manage
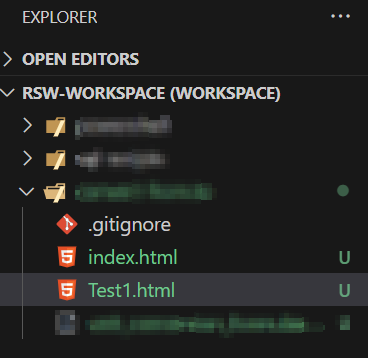
4) Expand the ‘Timeline’ section the sidebar
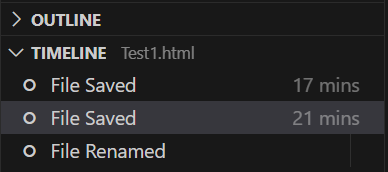
5) Select the item/s you want to view, and the current version along with the item selected from the timeline will show side-by-side.

Exploring the Timeline
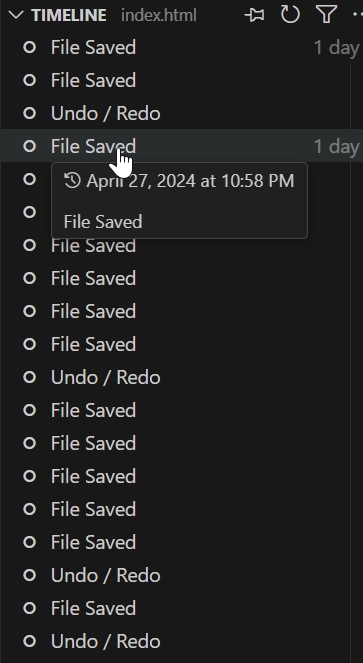
As you’ve already seen, the timeline panel displays a list of historical entries for the file, including commit messages, the author, and timestamps. Each entry represents a snapshot of the file at various stages of your project’s history. You can hover over each commit to see a summary of changes or click on it to view detailed differences between the current version and the selected commit.
Recovering Changes
To revert changes or recover a previous state of the file:
1) Preview Changes: Click on a commit in the Timeline to open a diff view, showing changes between the current file state and the selected commit.
2) Revert Changes: Right-click on the commit and select ‘Restore Contents’ to undo specific changes made at that commit.

Or, of course, if you don’t want to restore the whole file, just copy what you need out of it.
Best Practices
- Regular Commits: Make frequent commits with clear, descriptive messages. This makes it easier to navigate changes and understand the context of each snapshot in the Timeline. If you use GitHub Copilot, you can utilise that to create clear descriptions
- Use Extensions: Enhance your version control experience in VS Code with extensions like GitLens, which offers additional insights and controls over your repository history.
- Backup Often: Always ensure you have backups of your work. External backups can be a lifesaver in case of accidental data loss or repository issues. I store my local repos within a OneDrive folder, so they are also synced, just in case I were to lose my machine between commits.
Conclusion
The Timeline feature in VS Code is a valuable tool for developers looking to manage their code effectively. If you haven’t used it yet, mastering this feature can significantly enhance your workflow, providing you with the flexibility to experiment with changes while ensuring that you can always revert to a stable state.
Remember though, the key to effective version control is regular commits and clear documentation of changes. Happy coding!
FAQ
1. Can I use the VS Code Timeline feature with other version control systems besides Git?
No, the VS Code Timeline feature specifically leverages Git’s versioning capabilities. To use this feature, ensure your project is under Git version control. Other version control systems are not supported by this particular feature in VS Code.
2. How can I view changes made by other collaborators on the same project using the VS Code Timeline?
You can view changes made by other collaborators by selecting the relevant file in the Explorer, expanding the Timeline section, and viewing the commit history. Each entry shows the commit message, author, and timestamp, allowing you to track changes made by different team members.
3. Is it possible to filter the timeline entries by specific commit messages or authors?
Yes, you can filter timeline entries by specific commit messages or authors using extensions like GitLens. GitLens enhances the version control experience by providing more detailed insights and filtering options for your repository history within VS Code.