
You can use your Synology NAS as a reliable Time Machine backup target by enabling SMB, creating a dedicated shared folder and user, and configuring Time Machine on your Mac. This gives you automated, encrypted, network-based backups without needing an external drive.
Why Use a Synology NAS for Time Machine?
Using a Synology NAS for Time Machine backups offers several advantages:
- Centralised backups for multiple Macs
- Always-on storage (no forgotten external drives)
- Quota control to prevent backups consuming all disk space
- Data redundancy via RAID and snapshots
For home users and small teams, it’s a clean, scalable solution.
What You’ll Need
Before you start, make sure you have:
- A Synology NAS running DSM 7.x
- A Mac running macOS (Big Sur or later recommended)
- Administrator access to DSM
- Enough free storage on the NAS
Step 1: Enable SMB File Services on the Synology NAS
Apple Time Machine uses SMB to connect to network backup targets.
1) Logon to your Synology NAS box via the browser
2) Go to Control Panel

3) Select File Services

4) Select the SMB tab:
5) Tick Enable SMB service
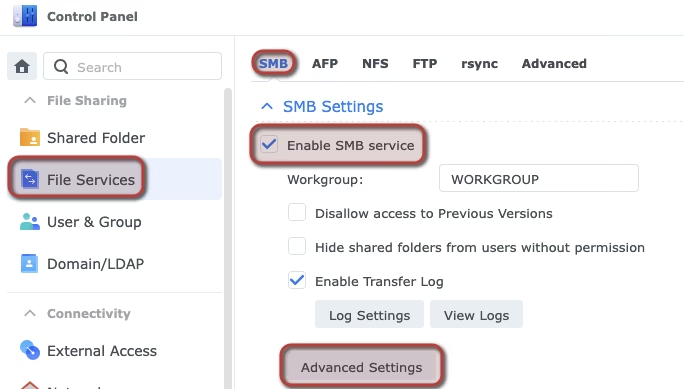
6) Click Advanced Setting
Set these settings and click Save
- Set Minimum SMB protocol to SMB2
- Set Maximum SMB protocol to SMB3
- Set Enable Opportunistic Locking
- Set Enable SMB2 file leasing
- Set Enable SMB3 directory leasing
- Set Apply to all shared folders
- Set Enable SMB durable handles
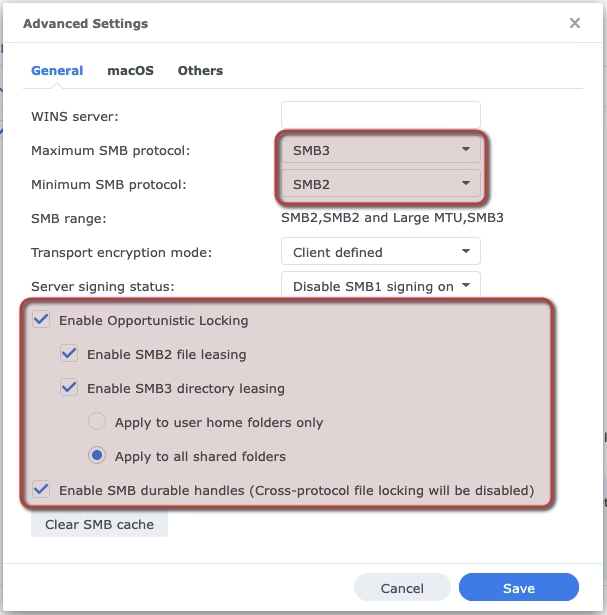
Click Apply (there is a change that all of these settings were already correct, so no changes may be required)
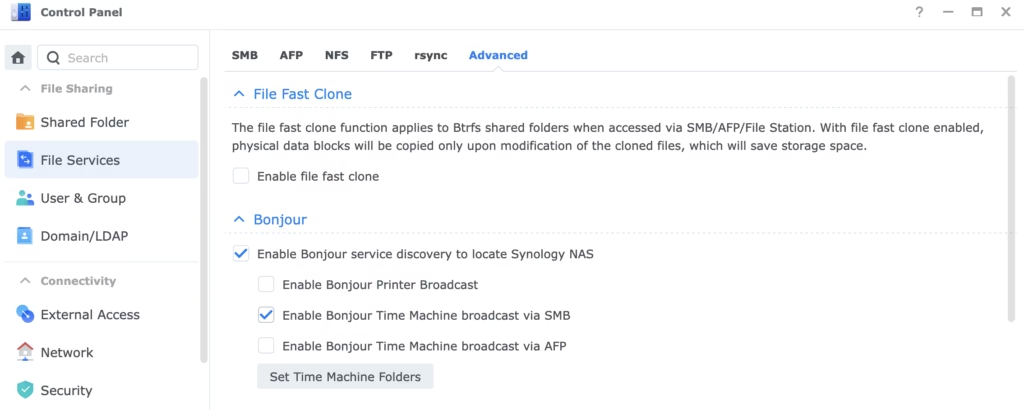
7) When saved, you should be able to go to Control Panel > File Services, select the Advanced tab, check Enable Bonjour Time Machine broadcast via SMB
This step is optional though, it doesn’t seem to be required, but should make it slicker (to be determined from my perspective)
💡 AFP is deprecated by Apple and should be avoided on modern macOS versions.
Step 2: Create a Dedicated Time Machine Shared Folder
1) Logon to your Synology NAS box via the browser
2) Go to Control Panel
3) Select Shared Folder
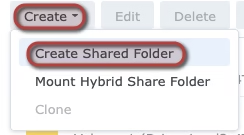
4) Click Create and then Create Shared Folder
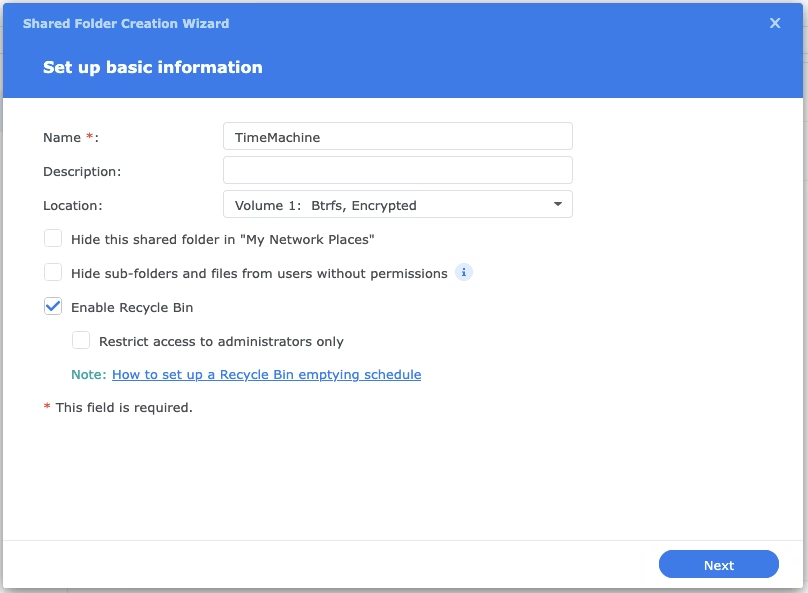
5) Name the folder (something like TimeMachine) and select your storage volume, check the Enable Recycle Bin and click Next
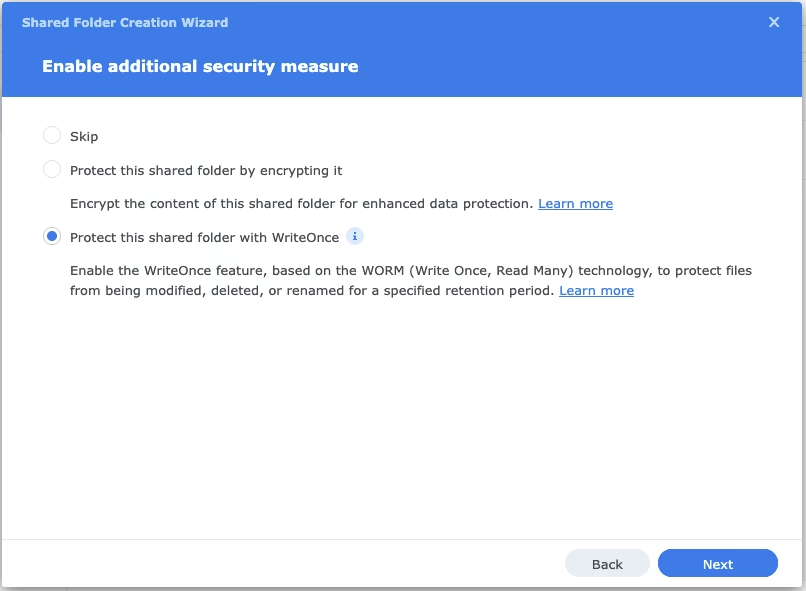
6) Decide if you want to protect your backups. You have three options:
- Skip (no protection)
- Encrypt (password protection, so could be accessed / deleted, but not usable without the encryption key)
- WriteOnce (makes your backups immutable, which means that they cannot be altered or deleted)
WriteOnce is the option with the most protected, and is essential to protect yourself from ransomware attacks.
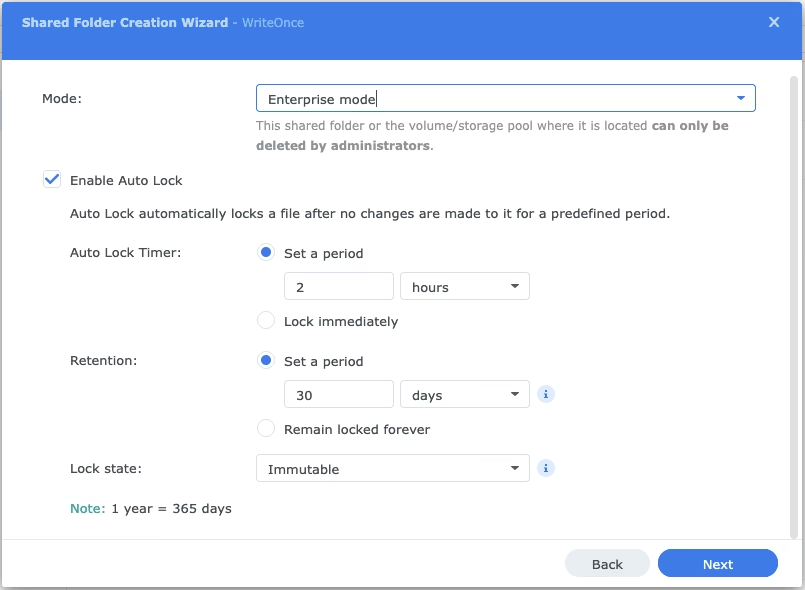
7) If you selected WriteOnce, define how long you want to protect your files for. I’ve gone with the below, but I will increase the retention when I get more storage:
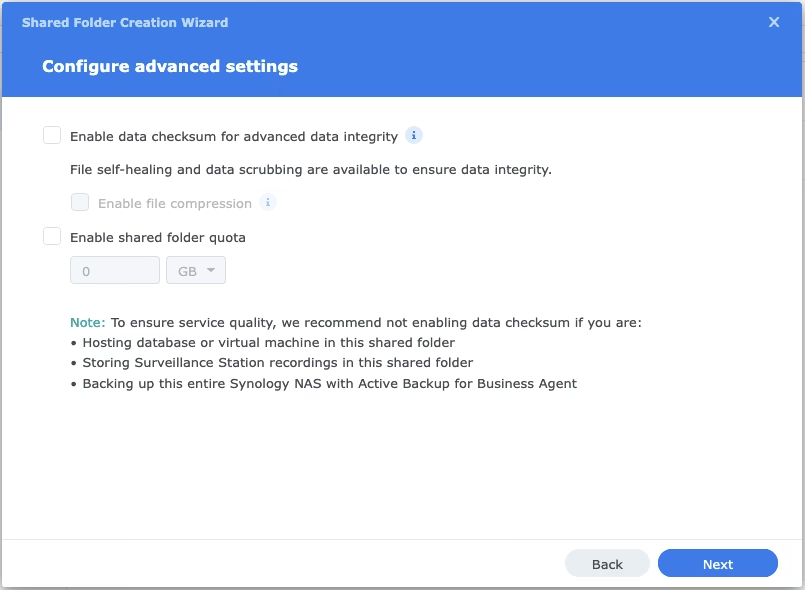
8) I’d recommend enabling the data integrity option, but it’s your choice:
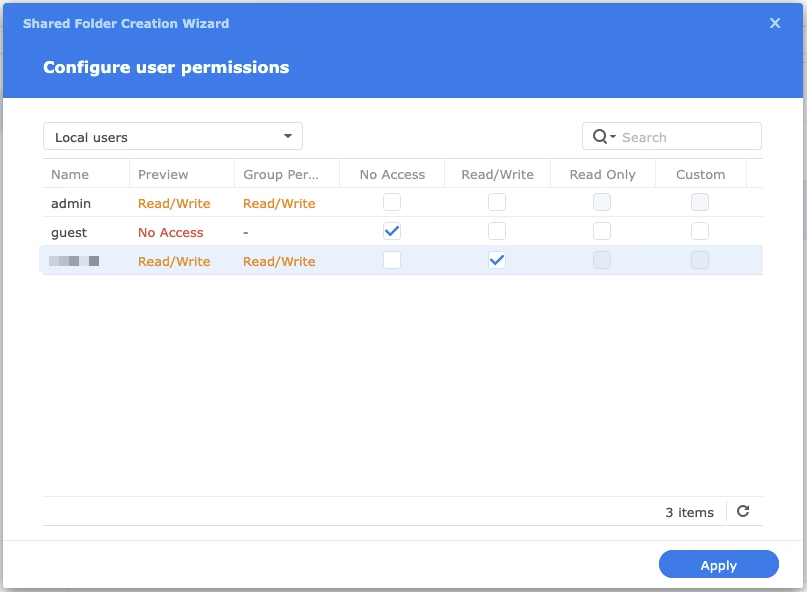
9) Keep clicking Next until you see the permissions an select your desired permissions by user and click Apply
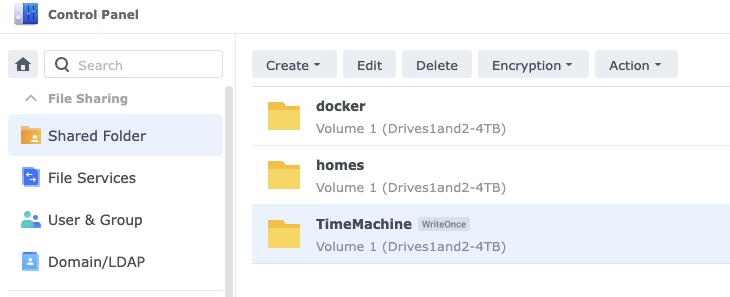
10) When done, you’ll see you shared folder similar to below:
Step 3: Configure Time Machine on macOS
Before you setup your Mac to work with your NAS, consider if you want to create a separate TimeMachine user. If you do, create one and assign the permissions before doing the below:
1) Open Finder
2) Press CMD + K
3) Enter the below, replacing <<NAS Name or IP>> with either the name or IP address of your NAS box and click Connect
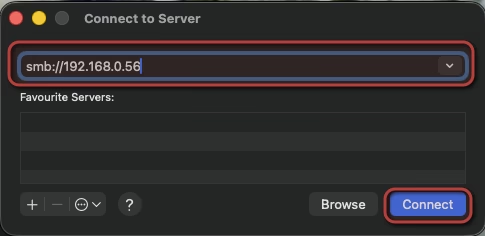
4) Click Connect on the popup

5) Enter your username and password (your NAS credentials) and click Connect
If you see an option to remember the credentials, check it
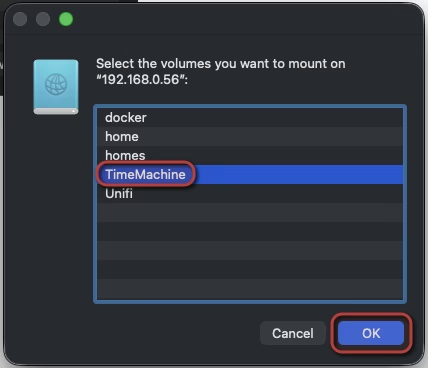
6) Select your TimeMachine backup share (which you created above) and click OK
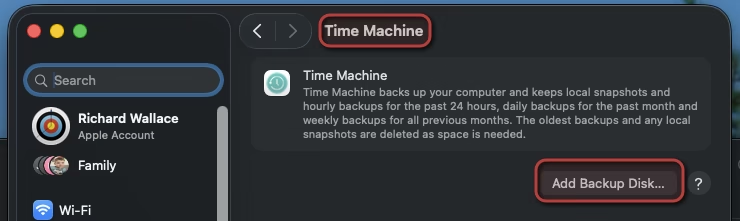
7) Open System Settings → General → Time Machine
8) Click Add Backup Disk
9) Select you TimeMachine drive and click Set Up Disk

10) You’ll be asked to enter your NAS username and password again, so that and click Connect
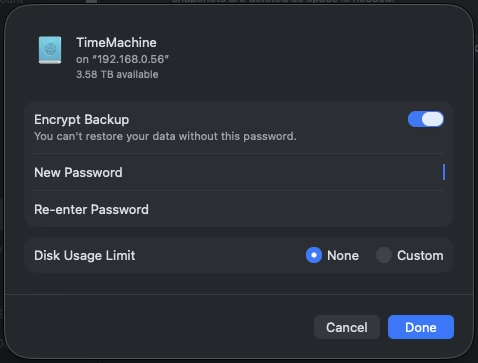
11) Enter an backup encryption password (if you want to encrypt your backups) – save it somewhere safe, and click Done
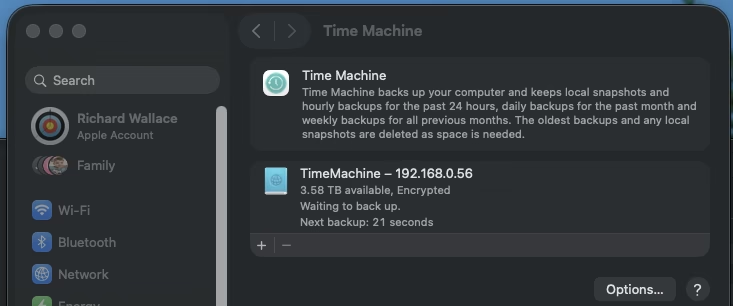
12) That’s it, your backup will then start in around a minute
⏳ The first backup can take hours over Wi-Fi, a hard wired ethernet connection is much faster.
Performance & Reliability Tips
- Use wired Ethernet for the NAS and Mac if possible
- Avoid Wi-Fi extenders for backups
- Set backup times outside working hours
- Keep DSM and macOS fully updated
Final Thoughts
A Synology NAS makes an excellent Time Machine target—secure, automated, and scalable. Once configured, it’s largely “set and forget,” giving you peace of mind that your Mac is backed up continuously without relying on external drives.