If you’ve invested in a UniFi Dream Machine (UDM, UDM Pro, UDM Pro Max or UDM Special Edition), you’ll know how powerful it is for managing your home or small business network. But did you know that it can route your outbound traffic through a VPN client, such as NordVPN? I’ll show you how.
Most people won’t need to use a VPN, but you could opt to use one to route certain traffic to certain destinations via one to simulate being in a different country.
I accept no responsibility for you use of this, and I recommend you do not use it to break any laws or breach any terms and conditions!
This post will walk you through setting this up, and if you don’t already have NordVPN, please create and account now.
Why Use NordVPN with UniFi?
NordVPN is one of the most reliable and well known VPN providers, so it naturally is a good choice to use with your UniFi Dream Machine, it will allow you to:
- Encrypt your entire network at the gateway, not just per-device
- Route specific devices or VLANs through the VPN (e.g. a “Streaming” network or a “Remote Work” network)
- Access geo-restricted services
- Bypass censorship or throttling rules imposed by your ISP or country
Now lets get started.
Step 1: Download Your NordVPN Config Files
1) Login to your NordVPN account via https://my.nordaccount.com
2) Select ‘NordVPN’ under ‘Products and Services’

3) Select ‘Set up NordVPN manually’ under ‘Manual setup’ in the ‘Advanced’ section

4) Select ‘OpenVPN config files’

5) Find a server you want to download, and click ‘Download TCP’ next to it. The first two letters relate to the country. For this example I’ve used be149.nordvpn.com

Do not close this screen, you need it for the next step.
Step 2: Obtain your NordVPN service credentials
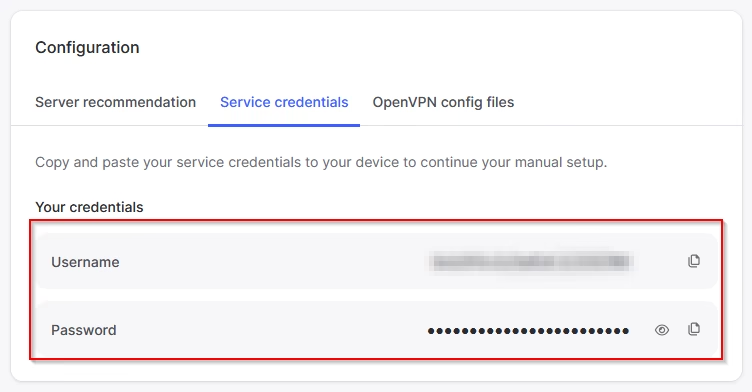
1) Whilst still in in your NordVPN account, select ‘Service credentials’

2) Verify yourselft
3) Copy your credentials, as you will need these
Step 3: Setup the VPN Client in UniFi Dream Machine
1) Login to https://unifi.ui.com/ or your device locally
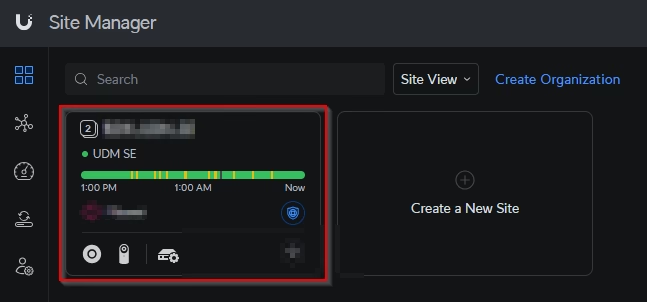
2) Select your network device
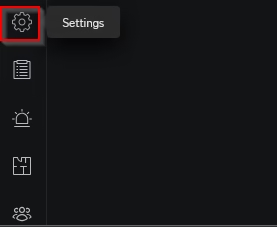
3) Click ‘Settings’, to the lower left
4) Select ‘VPN’
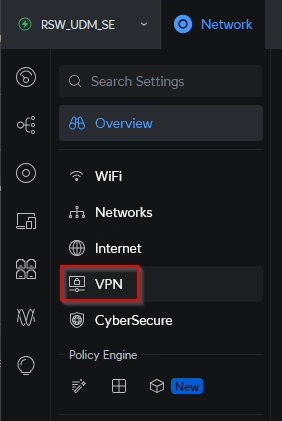
5) Select ‘VPN Client’

6) Click ‘Create New’

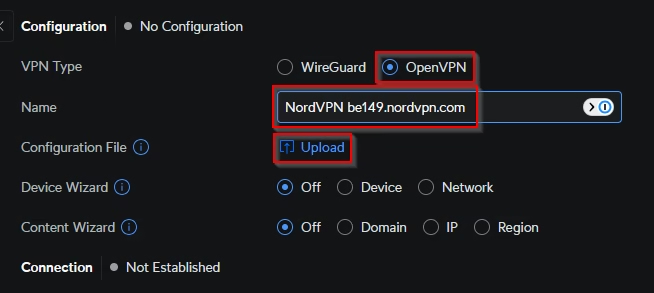
7) Select ‘OpenVPN’, enter a name and upload the OpenVPN profile that you downloaded in step 1
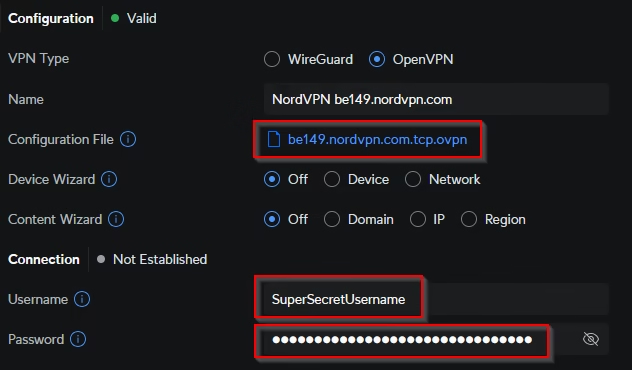
8) After selecting the OpenVPN profile, username and password fields will appear. Fill these in with those saved from step 2
9) Click ‘Apply Changes’

10) You will then see it try to connect. When connected, it look like the below:
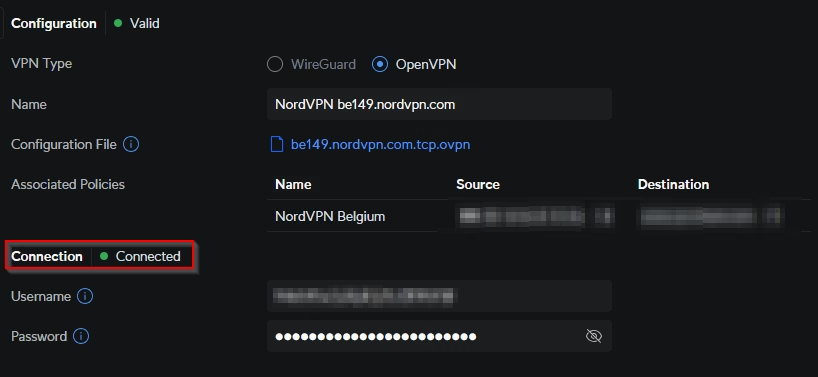
Remain logged in, as you will need it for the next step.
Step 4: Configure routes to use NordVPN Client in UniFi Dream Machine
1) Click ‘Settings’, to the lower left

2) Click the ‘New’ button under ‘Policy Engine’

3) Enter a name, select your network/s or device/s, check route and select either all traffic to define specific domain names (this example is domain based), check QoS, and select your NordVPN client connection as the interface.
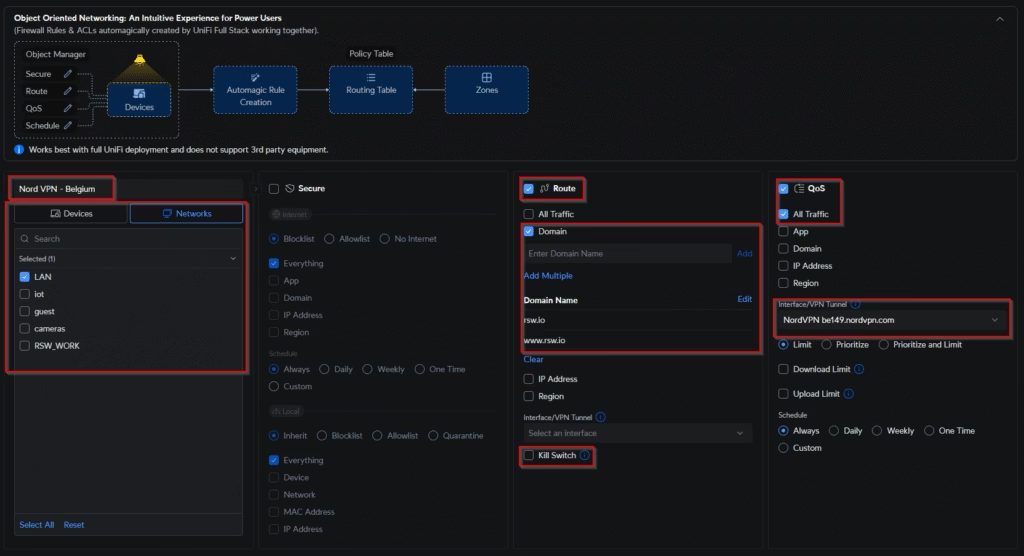
It’s up to you if you uncheck ‘Kill Switch’. If it’s checked, that website will be unavailable if the VPN goes down, but if it’s unchecked it will use any connection, but the selected VPN will be the preferred interface.
4) Click ‘Add’
That’s it, everything is now configured and your chosen data f
Summary
Setting up NordVPN on your UniFi Dream Machine is simpler than you might thought, especially now that UniFi’s GUI supports VPN clients directly. By uploading NordVPN’s OpenVPN configuration file, entering your service credentials, and creating a traffic route, you can protect your network and devices without touching the command line (which is how it used to be done a few years back)).
Whether you route all devices through NordVPN or create split-tunnel VLANs for more control, the result is the same: encrypted, private browsing for your home or office. Combined with NordVPN’s speed and reliability, your UDM becomes a true all-in-one privacy hub.
Ready to lock down your UniFi network? Get NordVPN today

